This blog post was first published on the ConversionWorks blog when I released this template to Simo’s GTM Template library. Since this has now been published into the Official GTM Custom Template library I felt that it was due for an update.
Zones have been a feature of Google Tag Manager 360 since March 2018, enabling companies to easily load and manage multiple containers on the same website.
Why would you want to do that? There are a myriad of reasons: to restrict access to certain tags, controlling tag types allowed on site, keeping containers under the maximum size allowed, in the current climate of GDPR they can also be used to isolate marketing (in fact all) tags, only letting them fire once consent is given.
You could just add multiple scripts into the Head, but if you want to remove or add containers then that requires dev work, which can can take weeks, sometimes months to get. You could also implement the containers using a GTM custom HTML tag, but if you have too many of these they’ll fill up your container and slow down GTM (Note: It would slow down GTM, not your site. GTM is Async so doesn’t slow your site.)
So zones are useful, no denying that, but annoyingly they’re only available if you have GTM360, which requires GA360 and that comes with a licence fee that many smaller companies simply can’t afford. So how can all those free users get access to this wonderful feature? Enter Custom Templates.
Disclaimer: The template described doesn’t give you the exact functionality of Zones, you can’t choose which tag types you want to run in your container and it doesn’t create a zones tab in the sidebar…
How does it work?
Before we look at the custom template, we need to understand what the GTM script actually does:
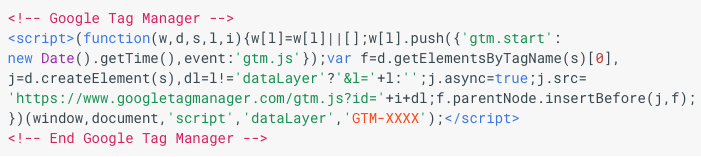
Broken down into steps:
- Initialise the dataLayer, if it doesn’t already exist.
- Initial dataLayer push of gtm.js
- Find the first script tag on the page
- Create a new script tag
- Check the name of the dataLayer, if you’ve renamed it.
- Set the script tag as asynchronous
- Add the GTM container script as the source for the script tag
- Insert the script tag on the parent node (head) before the first script tag.
There’s also the noscript iframe that loads GTM if javascript isn’t enabled.

This template doesn’t work with or support the noscript tag. Custom Templates require javascript to run, so if there’s no javascript the template can’t work. The only tags you can get in non-JS GTM are custom image tags, so these need to be created separately if you want to use them.
Back to the main tag, although it looks complicated it’s actually only doing two things, dataLayer initialisation and script injection. As we’re using a custom template to insert another GTM container, we can reasonably assume that the dataLayer already exists and is initialised, so there’s no need to worry about the dataLayer.
This means that all we need to do is inject the script and the custom template has an API for just this action – “injectScript”.
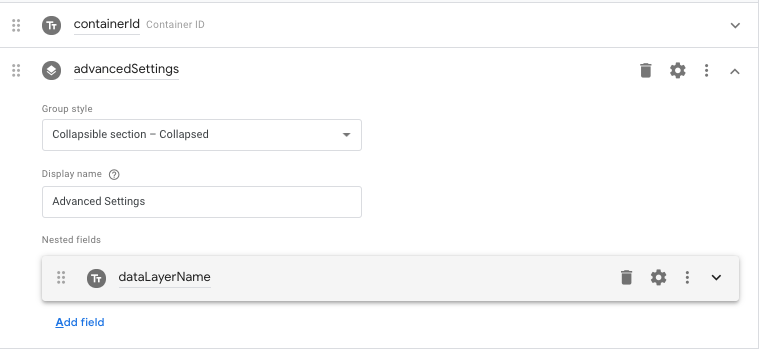
To create the template we’re going to need two text fields:
- ContainerId
- dataLayerName
For the most part, you’re not going to change the dataLayer name so, to reduce the risk of it being changed, I’ve nested the dataLayer name field inside a collapsable group.
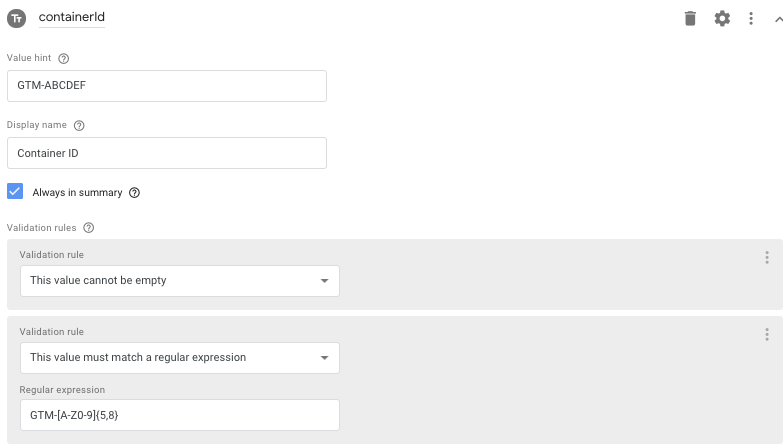
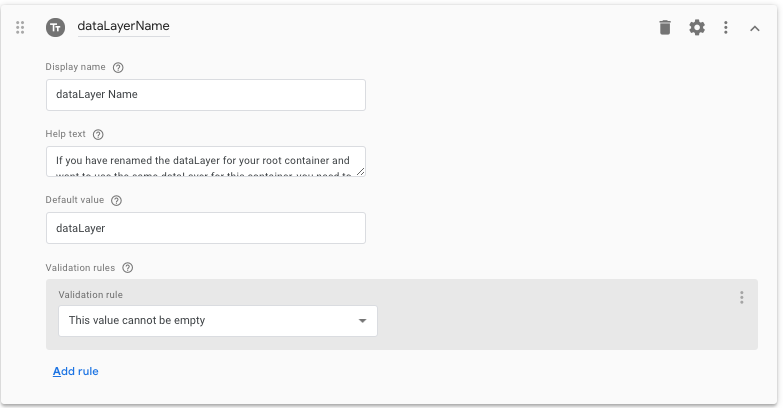
Once you’ve created the fields you need to set the validation and default values.
For our containerId I’ve used a RegEx match to validate the Container Id and required that it can’t be empty.
For the dataLayerName the default value is set to dataLayer and it can’t be empty. Nothing too complicated.
Once that’s done the only thing left is to build the code, which is pretty straightforward.
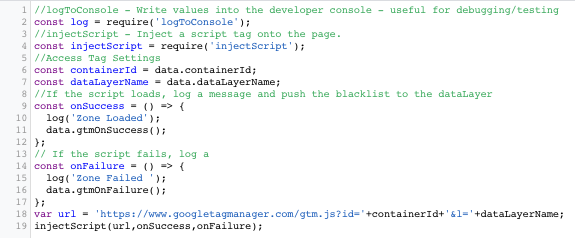
To walk through the code:
- Require the APIs, for this code we’re using logToConsole and injectScript. Although logToConsole isn’t required it’s useful to for testing and debugging.
- Access the template data and store these as constants.
- Define the onSuccess and onFailure events. These both log to console and then fire the relevant GTM event.
- Create the GTM URL. This is done by concatenating the attributes from the text fields and the gtm.js URL in the appropriate places.
- Inject the script, calling onSuccess if the injection works or onFailure if it doesn’t.
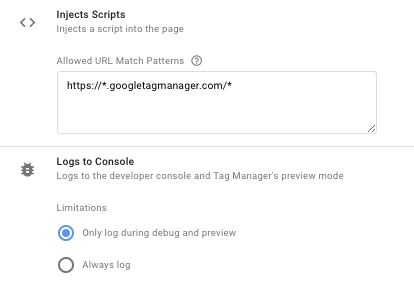
The final step is to set the permissions for the template:
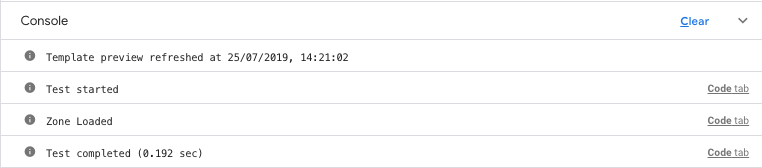
And that’s it, you’re ready to test. Assuming you didn’t make any typos and use a real GTM container ID you should see:
How to use it?
This custom template replicates the container loading functions of the GTM360 feature ‘Zones’. Analysts familiar with GTM360 may already have specific uses in mind, but I have one main use for this that I’m going to go into.
Anyone who hasn’t had their head stuck in the sand for the last year and a bit will have heard of GDPR and CCPA. It gives users control over their data and requires us to control over which tags fire on each page.
In its most setups you’re probably loading three categories of tags on the site:
- Measurement - Google Analytics
- Performance - Hotjar, A/B Testing Software etc.
- Marketing - Google Ads, Facebook Floodlight, Linkedin, Twitter etc.
Rather than having all tags in the same container and having complicated load rules for each tag, each category has its own container, which is loaded using the container injection template by the root container, as in the diagram below, which has measurement and marketing tag containers:
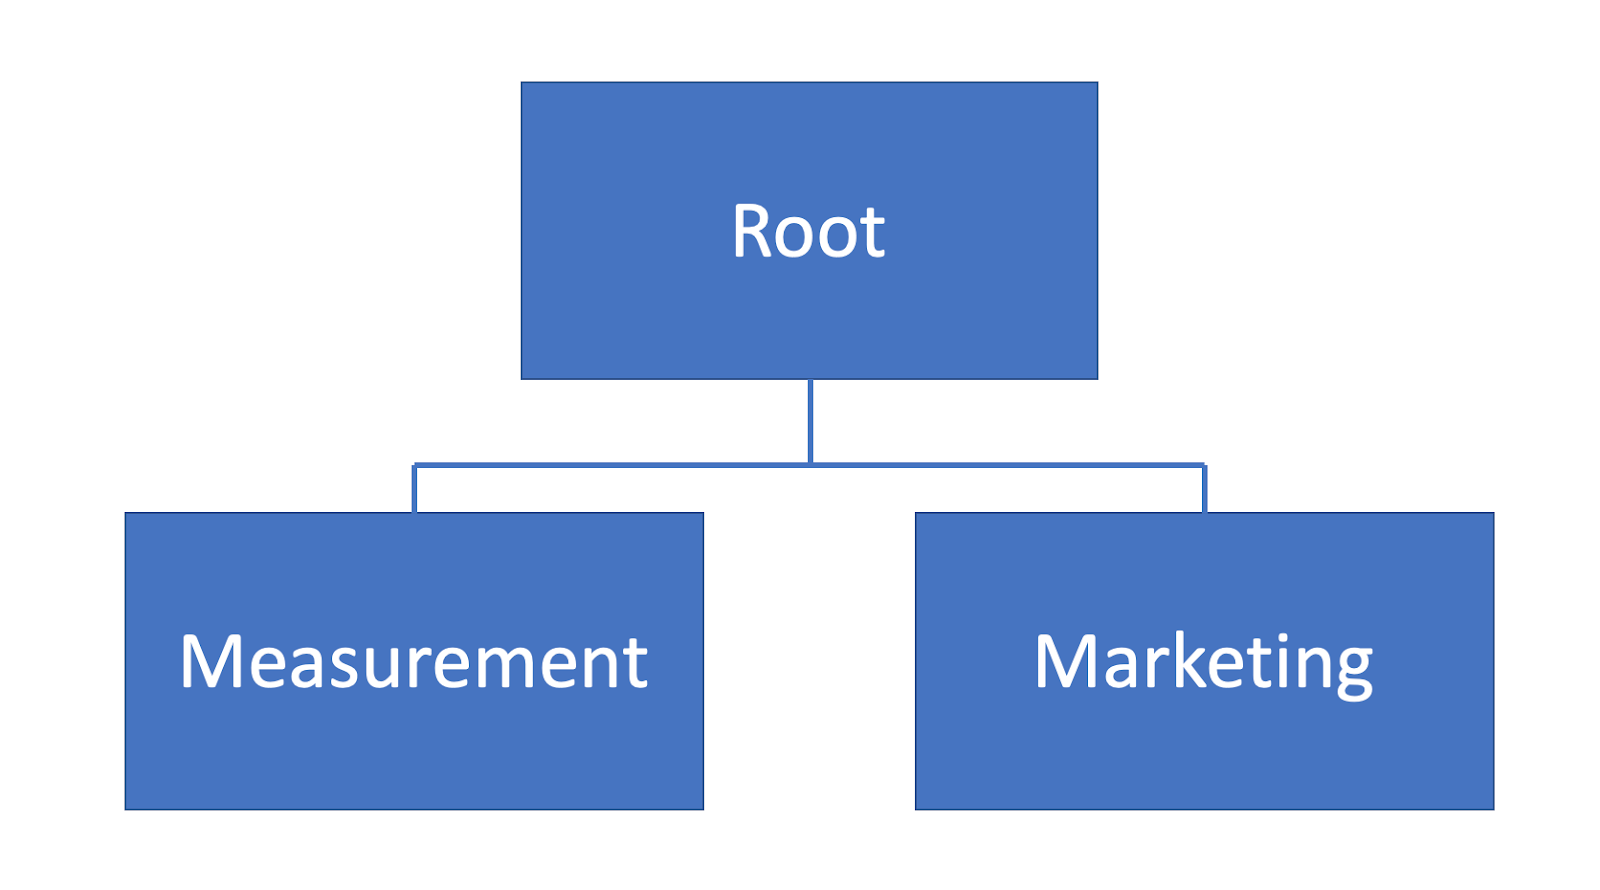
The snippet for the root container is loaded onto the site, and the other containers are loaded by the template, based on the firing triggers in the root container.
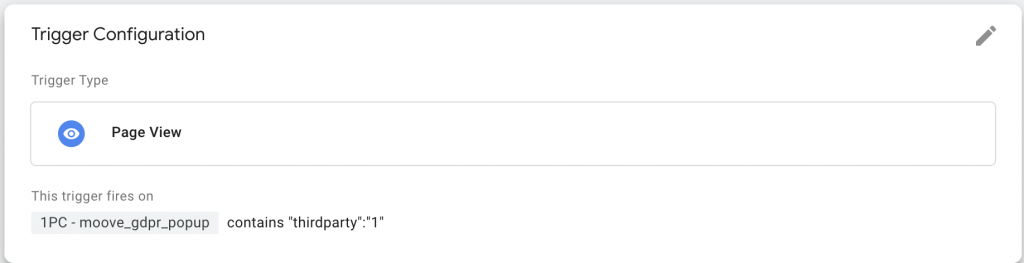
In the example below, the measurement container is loaded on all pages, whereas the marketing container is loaded based on two triggers.

The first is a custom event that is fired by the cookie consent tool on the site when a visitor agrees to accept cookies.

This loads the container as soon as the user has accepted cookies. You don’t need to worry about GTM events having already happened. Once the container loads it reads the dataLayer and processes the events in sequence.
The second trigger is a page view trigger that fires if the cookie set by the consent tool is present and they accepted third-party cookies.
By using separate containers that are only loaded once consent has been given, you reduce the risk of tags accidentally firing on the wrong pages, management is easier. You can also give GTM access to marketing agencies without them touching the analytics setup or implementing tags that bypass your cookie consent tools.
This is just one way you can use the container injector template to improve your GTM containers and deliver a more streamlined, logical setup for your sites.